The short answer
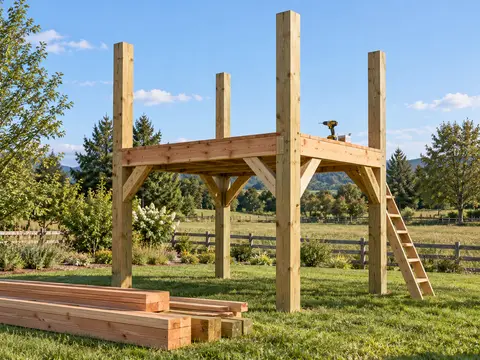
Lay out the posts, dig below the frost line, set 6x6 posts on piers, notch the beams, frame the 16 in deck, brace it both ways, add the guard and a rung ladder, then spread the safety surfacing. The open tree fort is 64 sq ft, with a deck 5 ft up, about $2,898 in materials with the surfacing, and 36 to 52 labor hours.
A freestanding treehouse is a tree fort on posts: a raised deck held up by four posts on concrete piers, with no tree anywhere near it. That is what we draw, because the structure then does not depend on a living tree that grows, sways and drops branches. The steps below follow our open tree fort, an 8x8 platform on four 6x6 posts with a guard and a rung ladder. Change the size in the designer and the numbers change with it.
The open tree fort has 64 sq ft of deck, 5 ft off the ground, with 4 posts. Materials come to about $2,898 with the safety surfacing (Home Depot prices read October 2026), and the build takes about 36 to 52 labor hours, roughly 2 to 4 working days for two people. If you only want the plan itself, open the open tree fort plan. If you are still deciding on a size, start with what a treehouse costs.
Before You Dig
Depends on where you build
Ask your building department first
Local approval not checked here. Many US jurisdictions exempt play structures up to about 200 sq ft (the IRC model), but thresholds, setbacks, HOA rules and zoning vary. Confirm with your local building department before you dig. The designer also has a Canada mode that uses NBC 2020.
Pick a Clear Spot
The use zone is the open ground around the fort. A child falling or jumping off lands there, so it has to be free of fences, sheds, house walls, trees and poles. The CPSC1 home playground guidelines ask for at least 6 ft in every direction from any structure or obstacle, and 9 ft between two structures when the platform is higher than 30 in. Walk the spot with a tape before you stake anything.
Call 811
Safety
Before the auger touches the ground
Call 811 a few working days before you dig so buried power, gas, water and sewer lines are marked. Keep helpers and children clear while an auger turns, and never dig on a guess about where a line runs.
- 1U.S. Consumer Product Safety Commission Public Playground Safety Handbook, publication 325
- 2U.S. Consumer Product Safety Commission Safety Tips for Home Playground Equipment, publication 324
Step 1: Lay Out the Posts
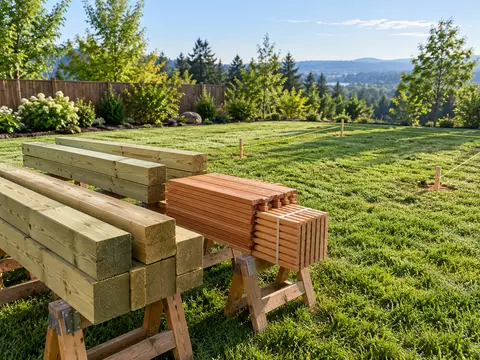
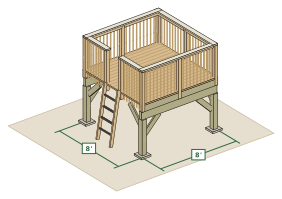
Put a stake at each post center and run string lines between them, a few feet outside the stakes so the strings survive the digging. On the open tree fort the four posts form a square at the corners of the deck.
Square the Layout
Measure both diagonals from corner to corner. They must match before you dig a single hole. A layout that is out of square carries through every later step, and by the time the deck is on you cannot fix it.
Confirm before you continue
Both diagonals match
Measure corner to corner both ways. If they differ by more than 1/2 in, move a stake and measure again before the first hole.
Mark the Hole Centers
Drop a plumb line from the string intersections to the ground and mark each center with paint. Measure each center off the strings, not off the hole next to it, so a small error does not add up across the layout.
Step 2: Dig the Footings
Each post sits on a concrete footing. Dig at least 12 in below the undisturbed ground or below your frost line, whichever is deeper (the Deck Construction Guide, DCA6, sets that rule for deck footings, and it is the one our designer uses). Your building department knows the local frost depth. The footing also holds the fort down in a wind: the designer works out how hard each post can pull up and makes the footing wide or deep enough that its own weight holds it.
Pour the Footings
Pour concrete to the bottom of each hole and bring it up as a pier to 2 in above the ground. Set a cast-in post base with a standoff in the wet concrete, at least 3 in from the edge of the pier, so the wood never sits on the concrete. The plan uses a Simpson CBSTQ base, rated for uplift and for a sideways push. Keep the bases lined up on the string lines as the concrete sets.
Why the Post Does Not Go in the Ground
It is tempting to drop the post straight into the hole and backfill. We do not draw it that way. Simpson Strong-Tie, a connector maker, advises against burying deck posts because of the risk of rot, so the maker’s advice is to use a base. Our footing is a pier with a post base for that reason, and it is why the next step uses a post on a base, not in the ground.
Confirm before you continue
Every pier at the same height
Check each pier against the string line and against the others with a level. A pier that is high or low shows up as a deck that is not flat.
Step 3: Set the Posts and Beams
The posts are 6x6. The DCA6 deck guide sets 6x6 as the minimum for a deck post, and it keeps the post in range of its loads. For a fort at 5 ft, the vertical load is not what limits you, the sideways load is, which is why step 5 has braces.
Choose the Right Wood
Use pressure-treated lumber. The DCA6 guide specifies treatment for above-ground use (UC3B) for the frame and ground-contact treatment (UC4A) for anything that touches the soil. Brush a preservative on every cut end, because cutting opens the wood to the part the treatment did not reach.
Post to Beam
Set the posts in the bases, plumb on two faces, and brace each one temporarily with stakes and 2x4s in two directions: a post on a base can rotate until the knee braces are on. Then fix the beams. A two-ply beam sits in a notch cut in the top of the 6x6, bearing on it fully, with two 1/2 in through-bolts (DCA6 Figure 8A); a three-ply beam sits in a post cap. The DCA6 guide prohibits fixing a beam to the side of a post without a notch.
Confirm before you continue
Posts plumb on two faces, tops level
Check every post plumb from two sides, and check the beam tops are level with each other before the joists go on.
Step 4: Frame the Joists and Deck
Joists run across the beams at 16 in on center. The DCA6 table for Southern Pine at that spacing allows a 2x6 to span 9 ft, a 2x8 11 ft 10 in and a 2x10 14 ft, so the 8 ft platform of the open tree fort is well inside the range for a 2x6 or heavier. The designer picks the joist size for the size you draw.
Joist Hangers and Spacing
Hang each joist from the beams with a joist hanger, or sit it on top and tie it with a framing tie, and nail the hanger to the manufacturer’s pattern. Keep the joists straight with blocking at mid-span.
Decking
Lay 2 in decking across the joists, fixed with two 8d threaded nails or two number 8 screws at each joist, with about 1/8 in between boards so water drains (the DCA6 guide). Let the boards run long and trim them to the edge with a saw once they are down.
Confirm before you continue
The deck is flat and the boards are fixed
Walk the deck. A board that moves or a joist that is not flat is easier to fix now than after the guard is on.
Step 5: Brace It Both Ways
A freestanding fort has no wall to lean on, so the bracing does the work. Fix 2x6 knee braces at 45 degrees from each post to the beam and to a doubled joist over the post, through-bolted at both ends, so the structure is held in both directions.
How the Bracing Is Sized
The DCA6 guide leaves the sideways stability of a freestanding deck out of its scope, so there is no table to copy. The designer calculates it instead: the wind on the side of the fort from the pressures in the IRC tables, at the wind speed you enter, or a 200 lb push at the top of the guard, whichever is greater. Each brace, its bolts, the posts and the post bases are checked against the NDS wood design rules and the maker’s ratings, and the plan lists the leg length and the number of bolts that pass.
Check Every Brace
Tighten every bolt, check the braces do not loosen when you push the deck sideways, and revisit them after the first few weeks of use, because wood moves as it dries.
Confirm before you continue
No movement when you push the platform
Push the corner of the platform in each direction. If the deck moves, add brace length before you go any further.
Step 6: Build the Guard
The deck of the open tree fort is 5 ft above the ground, which is above 30 in, so it needs a guard on every open side. Our planner draws the guard at 38 in, which is the higher of the IRC minimum (36 in) and the CPSC1 figure for school-age children.
Posts and Balusters
Fix the guard posts to the deck framing with through-bolts, not nails or screws, and fix the rails between them. For balusters, the gap is 3 in gap at most. The IRC sphere test is 4 in, and we use the tighter figure for children.
No Gaps Between 3-1/2 and 9 In
A gap of 3-1/2 to 9 in is an entrapment hazard for a child’s head, so it is not allowed anywhere on the fort, including between the deck and the guard. When the deck is more than 48 in off the ground, the CPSC1 wants a barrier with no horizontal rails a child can climb. Our open tree fort uses vertical balusters for that reason. The guide to railing height covers the numbers in detail.
Safety
Test the guard before anyone uses it
Lean your weight on the guard at the top rail, along its length and at each post. It must not flex or move. Check every gap with a 3-1/2 in object, and keep bolt ends cut flush so nothing catches a sleeve.
- 1U.S. Consumer Product Safety Commission Public Playground Safety Handbook, publication 325
- 2U.S. Consumer Product Safety Commission Safety Tips for Home Playground Equipment, publication 324
Step 7: The Way Up
Our open tree fort uses a rung ladder. The CPSC1 guideline for public play equipment puts the angle of a rung ladder at 75 to 90 degrees, at least 16 in wide for school-age children, with the rungs no more than 12 in apart vertically. A rung ladder is the simplest access for a short deck, and it keeps the footprint small.
Fix the Ladder
Fix the ladder rails to the deck framing and to a footing at the base, so it cannot move when a child climbs it. Space every rung evenly, including the top one, and check that the angle is within range.
Hand Holds at the Top
A ladder with no handrail needs a hand support where the climber moves from the ladder to the deck, so the climber has something to hold while stepping across (CPSC1 325). Add grab bars or posts at the top, set where a child’s hand falls.
Confirm before you continue
The ladder does not move
Shake the ladder hard. If it moves, add a fixing at the base. Then climb it yourself, up and down, and make sure the top is as easy to leave as it is to reach.
- 1U.S. Consumer Product Safety Commission Public Playground Safety Handbook, publication 325
- 2U.S. Consumer Product Safety Commission Safety Tips for Home Playground Equipment, publication 324
Step 8: Add a Roof (Optional)
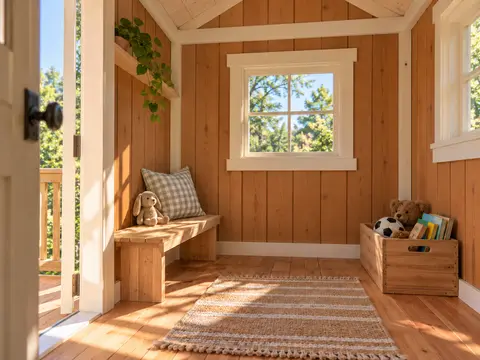
A roof turns the deck into a shelter and keeps off sun and rain. It adds weight and wind load to the same four posts, so the bracing matters even more. We draw it as a separate plan, the fort with a roof, with half walls and a single-slope roof, and the designer re-checks the structure when you add it. Wait until the open fort is solid and bring the roof on as the second stage.
Step 9: Spread the Safety Surfacing
The surfacing under and around a fort is a safety part of the build, not a finish. The CPSC1 guides ask for 9 in of loose fill kept up all the time, over the fort and 6 ft beyond it on every side, and rate each material for a fall height: wood mulch with no CCA-treated wood to 7 ft, wood chips, engineered wood fiber and shredded rubber to 8 ft.
How Much and Which Kind
Loose fill packs down by about a quarter, so the plan has you put in 12 in to keep 9 in. For the open tree fort that is playground wood mulch delivered in bulk, about $1,120, and it is in the materials total. Dig out the area or edge it so the fill stays where it is needed.
Keep It Up
Mark the 9 in level on the posts, rake the fill back under the ladder and the slide every month in the play season, and top it up each year. Do not put the fort over grass or dirt alone, and never over concrete.
- 1U.S. Consumer Product Safety Commission Public Playground Safety Handbook, publication 325
- 2U.S. Consumer Product Safety Commission Safety Tips for Home Playground Equipment, publication 324
Common Mistakes
- Skipping the diagonals. A layout out of square can not be fixed once the deck is on.
- Burying the posts. The post base on a pier lasts longer than a post set in the ground.
- Fixing the beam to the post face. Notch it or use a cap.
- Leaving out the bracing. The posts stand on bases that let them rotate, so the knee braces are what keep the fort upright.
- A gap between 3-1/2 and 9 in. It is an entrapment risk, so close it.
- No safety surfacing. A fall onto dirt or grass is far worse than a fall onto 9 in of mulch.
What the Plan Adds
The free designer shows the fort on screen with the checks and the priced materials list. The paid plan, $29, draws it as sheets you can take to the lumber yard and to your building department. If you would rather have a tree-free design of another type, see treehouse without a tree or browse the tree fort plans.
Sources
Every number in this guide that does not come from our own treehouse designer was checked against these 5 documents, numbered in the order the text first cites them and read between Oct 25, 2026 and Oct 26, 2026. 5 are playground guides and codes.
- 1U.S. Consumer Product Safety CommissionPublic Playground Safety Handbook, publication 325
- 2U.S. Consumer Product Safety CommissionSafety Tips for Home Playground Equipment, publication 324
- 3American Wood CouncilPrescriptive Residential Wood Deck Construction Guide (DCA 6, 2015 IRC version) (2015)
- 4City of Seattle2015 Seattle Residential Code (IRC 2015 adoption), chapter 3 (2015)
- 5Simpson Strong-TieCBSTQ cast-in standoff column base, load table (2026)